Pallet Wine Rack
The pallet wood wine rack in a simple and easy starter project for beginning your woodworking journey. The first recommendation for any pallet wood projects is to always choose useable pallets. The wood on the pallet needs to be decent. If the pallet you start with is cracked and busted up, the project will not turn out well. Dig through the pallet and try to find one with minimal damage. This will speed up your process and make the end result look much better.
For my pallet project, I take the pallet apart. Some projects don't require this, but I like being able to sand the boards and prepare the wood before rebuilding. I have tired several way to take a pallet apart. The easiest way I have discovered is to trim off the ends. With my circular saw, I run it down the ends of the pallets cutting off around 3 inches of material on each side of the pallet. This removes the 2x4 bases on each far side of the pallet. With the 1x4s now loose of each side and only connected in the middle by the remaining 2x4. At this point I take 2 hammers and pull the board up from both sides at once using the claws of the hammer. I feel this reduces the stress on the board from one direction or the other and causes less splitting on the wood. Repeat this process for each of the boards until the pallet is completely apart.
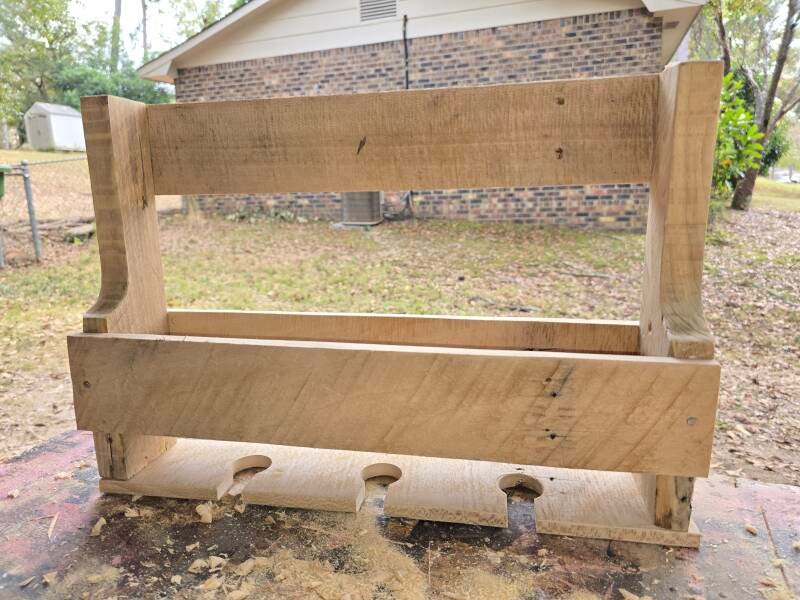
After the pallet is in parts, I sand the wood to remove any of the paint spills or anything unsavory on the wood surface. For this project I cut the 2x4 down to the desired length. For my supports, I cut them at 13.5 inches. You will need two of these. one for each end. Then I cut the slats for the front and back. There will be three of these slats total. These will each be 20 inches long (but you can make them basically any desired length). lastly there will be two more slat that is 18.5 inches (the same length as the others minus the width of the "2x4"s).
Once the cuts are made, Attach one of the 20 inch slats to the front and the other two to the back. One of the 18.5 inch slat needs holes drilled and slits cut to hold the wine glasses. For mine, I made tree holes. I drilled the with a 1.25 forstner bit and the used my jig saw to cut slits into the holes. Attach this slat onto the bottom of the entire project and the other one around three inches higher. This will allow a place for the bottom of the bottles to sit above the wine glass holder. Sand again now the project is together and finish the project with whatever stain, paint or finish you would like.
Blog Date 03.24.2025
Add comment
Comments